

3D Printing and Model Railroading are two hobbies of mine that I have posted about and are two hobbies that I feel could overlap quite well, but I have not come across many pages/forums that really go too deep into it.
I follow different groups on Facebook and follow some sub-reddits with both of these as their core topics but there doesn’t seem to be as big of an overlap from what I am seeing. Any time I have seen it the response has been a bit underwhelming and I am not sure of why. In my eyes, 3D Printing could take model railroad as a hobby a significant distance. The flexibility and depth that can be had designing or printing things for a layout is well worth looking into.
I wanted to put this post out there to share a couple different concepts that I think would be worth showing for potential. One thing that would be identifiable within the actual function of the layout and one that would be an item that would be used within the consist itself. First, something within the consist:
N Scale Shipping Containers
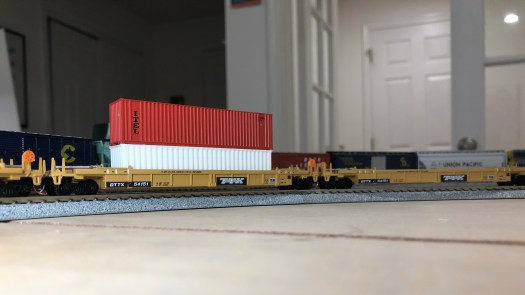
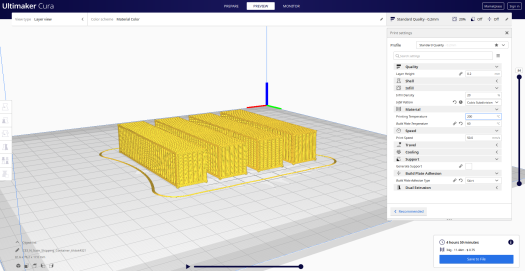
This weekend I was perusing Thingiverse and came across a design for a simple cargo container that you would see on an intermodal train or the back of a semi-truck. I decided to go ahead and print one as a test and see the limits of this level of detail in an N scale print.
Thingiverse Links for N Scale Container:
– Thing: https://www.thingiverse.com/thing:3476647
– Make: https://www.thingiverse.com/make:830373
I was very surprised by the quality of the print that was produced. N Scale (1/160) is such a fine size that Fused Deposition Modeling (FDM), additive manufacturing by applying heated layers of material onto one another and fusing together until the object is formed, typically is not able to produce fine enough quality to be accepted. In this use case, and for me, this container was adequate enough for me to accept.
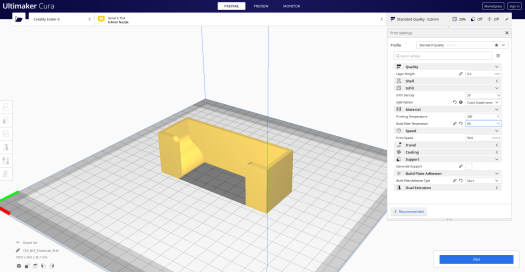
In addition to the container, I have recently added something that is used for a quality of life feature, a mount for my NCE PowerCab:
Mount for NCE PowerCab
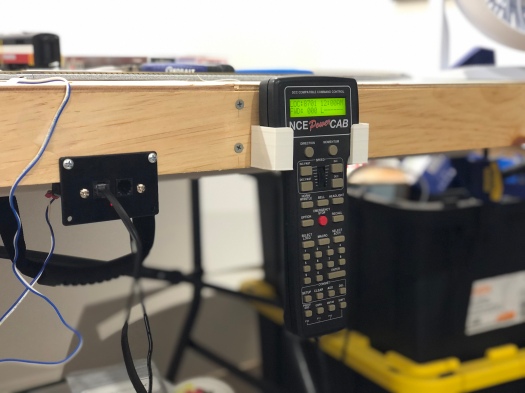
In addition to the container, I have been using the 3D printer for other areas of quality of life improvement and money savings. Another example is with finding a bracket to hold my NCE PowerCab throttle!
Thingiverse links for NCE PowerCab Mount:
– Thing: https://www.thingiverse.com/thing:2462551
– Make: https://www.thingiverse.com/make:830636
This throttle was something that I didn’t want to drop/have fall off the table, and eventually I wouldn’t want it sitting on the table itself either when trains were running and there was detail. I hopped on Thingiverse again and boom someone made a mount that I liked and I grabbed the files and printed it. This printed very quickly, and was a perfect fit for my NCE throttle. A piece of high-bond double sided tape and it was up and holding the throttle.
Other Uses:
These were two examples of things that I wanted and have tried so far specifically tailored to the railroad itself, but additional possibilities are there. If there is a building you want for your layout, or signal bridges, or even camera cars. There are tons of ideas out there and the material cost is low enough to give it a shot. While there is the up front cost of a printer itself, the material cost is a significant savings for the actual printed items themselves. The more you build the more the printer will pay itself off.
In the two example prints I showed above, the material cost of printing one container, and one mount was $0.60 – Yes, 60 cents US.
Printers are becoming much more accessible, and affordable and the uses are beyond those of a hobbyist. I have made mounts for a GoPro, a holder for USB drives/SD/MicroSD cards, controller holders, and even accessories for the printer itself.
I am hoping to see more people using 3D printing within the Model Railroad community and this to push growth in both hobbies.
Recognition:
I also would like to reach out to Jimmy from the DIY & Digital Railroad to give props for continuing to push DIY, digital knowledge and showing people the value in DIY and 3D printing in the Model Railroading community with easy to follow videos and tutorials.

Would have been nice to let us know which printer he used to produce this. What’s it a $300 one, or was it $3,000
Hello, I am sorry that the post wasn’t clear on the specific printer. It was intended to be used as a more broad post about 3D printing and the hobby versus the specific printer I am using in conjunction with the hobby. The prints shown in this post were made with a Creality Ender 3. I am happy to answer more questions if you have them. Thanks for stopping by!