

During the pandemic I have had a lot more time to work with my Creality Ender 3. This has led to a lot of time manually leveling the bed and working to achieve success when getting the initial layers on my prints. The process of constantly re-leveling the bed, and having things change between prints has led to a lot of frustration.

Last winter I upgraded the main board on my Ender 3 to the 1.1.5 board found here. That upgrade brought a significant improvement to the performance of my machine in addition to the silence it brought. Prior to that upgrade the Ender 3 was loud and annoying to be near when in operation. Since then, I have been able to have it behind me while working, playing games, etc. and the quality of the prints has been drastically improved.
With the added use, the amount of time spent re-leveling the bed is much more noticeable. In addition, printing things like Ear-Savers that I have donated to help during the pandemic also shows where there were errors during the leveling process.
I have held back on this upgrade as I am a novice when it comes to 3D Printing and, while I am technologically inclined, a lot of things when it comes to 3D printing are above my head. I am not familiar with the ins and outs of various firmware for 3D printers, or how to go about flashing them, and definitely don’t want to brick a machine like this when I am trying to save a bit of time. Then, I found out that Creality is now making a dedicated kit for installing a genuine BL Touch system to the printer.
As soon as I realized this, I was very excited as this was an upgrade I have been wanting since the beginning of owning this printer. Leveling the bed may not be the ultimate master code to resolving printing issues, but it is a major hurdle in achieving bed adhesion and quality prints.
I researched the kit and everything I was seeing was about a year old at this point and came with mixed opinions – from people who are actually familiar with the ins and outs of these machines, and can go about making these upgrades without a dedicated kit.
I decided that the pros outweighed the cons and pulled the trigger.
Initial Impressions
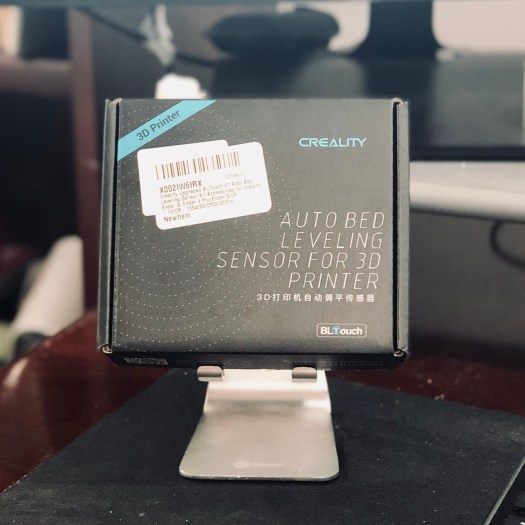
I received the BL Touch Kit and overall I am very happy with the quality of the physical hardware.

The instructions were absolutely atrocious. They included a QR code that redirected to the Creality homepage when viewed.
I attempted to follow Teaching Tech’s video overview of the process, however, my experience with the software, while just as bad, was not the same as his.
The installation of the hardware was no problem at all. The bracket is a solid piece of metal, and the BLTouch connects with 2 M3 screws. The wiring is straightforward, and was properly wired as opposed to other videos I have seen with BLTouch kits (of non-Creality kits).
Installation and Software
Being that I was following Teaching Tech’s instructions I first used the ISP USB interface to flash the firmware and this is where I hit my first hurde and struggled. I am not sure that my experience was identical, but I was first not even sure where to download the software, then, once found, I was unable to even get the software to launch without getting an error message!
I was feeling punched in the gut at this point, but continued to dig. I happened upon an article hosted on Medium, a site dedicated to blogging and sharing ideas, where the person mentioned renaming the file that contains the ProgISP software. Once I did that, I was off to the races. I flashed the latest 8 bit firmware and then updated my Cura settings to include the ABL code.
This is where I ran into the next problem, improper instructions to set the Z Offset. This one was outlined in the Teaching Tech video. For me, the Z Offset was initially set to -0.2, and the calculated adjustment, per the instructions, told me it would now need to be -2.9 – this just had filament not even hitting the bed. After trial and error, my Z offset is set to -3.6 and I have been having no issues.

Problems and what I did to overcome:
- Problem: Documentation in English
- Solutions: Utilizing video resources to ensure I understood the process.
- YouTube Resources: Teaching Tech, DanishGadgetGeek
- Solutions: Utilizing video resources to ensure I understood the process.
- Getting the necessary downloads.
- Creality has NOT made it simple to get the necessary files for this.
- Problem: The instructions assume that the user already has the progisp.exe.
- When I finally found this download on their site the software was throwing errors for me.
- Solution: When downloaded, the folder name included superfluous characters at the end and needed to be renamed: progisp+ 1.72
- Link to an article on Medium where I found this to be the solution is below.
- See link below as to Creality’s Google Drive Link for ProgISP
- Once renamed the software worked perfectly for me.
- Problem: Knowing what hex file is needed.
- Solution: Downloaded the latest firmware designed for BL Touch and Ender 3
- See link below as to Creality’s Google Drive Link for the hex file
- Solution: Downloaded the latest firmware designed for BL Touch and Ender 3
- Problem: The instructions assume that the user already has the progisp.exe.
- Creality has NOT made it simple to get the necessary files for this.
- Problem: Setting the Z Offset based on Creality’s instructions.
- Solution: Grind. Trial and error until the nozzle is laying filament properly.
- This was something that was criticized in Teaching Tech’s video and is something that I encountered as well.
- For me, the Z Offset was initially -0.2, and the calculated adjustment was supposed to be -2.9, and now, after trial and error it is set to -3.6
- Solution: Grind. Trial and error until the nozzle is laying filament properly.
Results
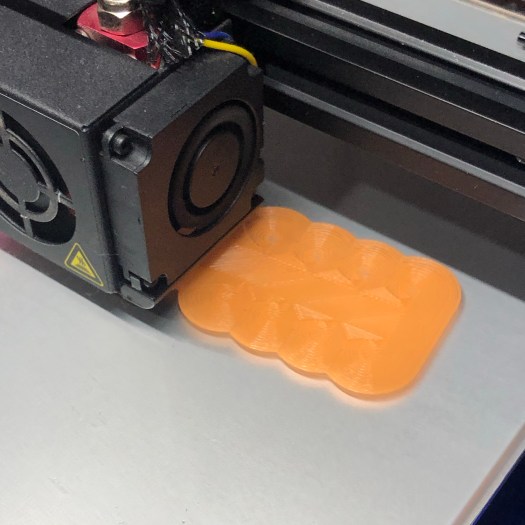
After a couple test prints, the BLTouch is definitely making a difference in leveling the bed. I have reprinted the Fan Shroud mod and the layer lines are consistent, and don’t show any signs of leveling issues. I printed a whistle, and the layers were super tight and even.
While there is criticism of the leveling time that is added to each print, for me, its not a big deal. When we are talking hours or days to complete a large print, a couple minutes tied up in bed leveling is not a big deal to me.
On average, including time for heating and leveling the process takes ~4-5 min in a room that is ~21C.
Resources I Found Helpful:
Creality Download Links:
ProgISP: https://drive.google.com/drive/folders/1lXXDpAtkGP2KVKi4O1yqBInqunWGrWvN
Marlin: https://drive.google.com/drive/folders/1JDbEMAqaiy_l8RkeGpbpMs-Gc1A0ojgY
Articles:
Renaming file: https://medium.com/@jethro_20307/creality-ender-3-pro-bltouch-v3-1-marlin-1-1-9-1-e3512ed9c81a
Please note this product was purchased with my own funds, however, as an Amazon Associate I earn from qualifying purchases. This in no way changes my opinion of the product. If you are interested in the product please see the link below:

great article and it helped me a lot. I had the same issues as you discussed. One additional item that I haven’t yet resolved is that when I attempted to close the board casing, I found the fan and pinboard interfered with one another.
Things definitely got tight in there for me but I am not having any issues with interference with the fan. Good luck!
I hade the same and I printed another case: https://www.thingiverse.com/thing:3643680
Kevin this is the post i have been looking for thank you! I am having the same issues here. I cant find the correct software to flash and it keeps telling me i need a bootloader which i dont believe i do. Regarding the firmware and progisp thats a whole other scenario would love to hear more and get your help.
Tim
You are a life saver! Nowhere does it tell you to download Progisp unless maybe it’s flashed in Chinese for .2 seconds on the guide video. And of course all the Youtubers just assume you either know it.
Thanks! I had a lot of trouble and felt a written guide consolidating my findings would be helpful!
Thanks a lot! This helped me to get further in the process, I was stuck for a couple of hours searching the progisp tool. First I thought it was on the USB (it appears so on some of the YouTube videos), then was looking for it online. Finally ended up here. It was nice to see the confirmation that the SW needs to be downloaded… Then the renaming of the folder was a great tip. The only thing now is that after I “load flash” with the new flash software it doesn’t give a “finished” message. Fingers crossed.